Quickstart
Install VDA on a single host with Docker Compose, create your administrator account, connect a datasource, and take a first tour of the platform.
This path sets up a single-host environment, which is ideal for evaluation, staging, and pilots. For production clusters, see Kubernetes & OpenShift Installation.
What you'll do
- Check prerequisites
- Configure your environment
- Start VDA
- Verify the installation
- Create your administrator
- Sign in
- Connect your first datasource
- Take a tour
Already have a VDA portal?
If your organization has already installed VDA, skip ahead to Step 8: Take a tour.
Step 1: Check prerequisites
You need a Linux host with at least:
- 8 CPU cores and 32 GB RAM (64 GB recommended for production workloads)
- 250 GB of SSD storage
- Docker Engine 24.0+ and Docker Compose v2.20+
Confirm your Docker versions and raise the kernel limits that the vector and search stores require:
docker --version
docker compose version

sudo sysctl -w vm.max_map_count=262144
echo "vm.max_map_count=262144" | sudo tee -a /etc/sysctl.conf
ulimit -n 65536
Full requirements and supported operating systems are in Docker Compose Installation.
Step 2: Configure your environment
Create a .env file in the repository root. Copy the template from the Environment Configuration section of the installation guide.
Then replace every replace_with_secure_... placeholder with a strong, unique value. You can generate one for each password like this:
Keep secrets out of source control
Never commit .env, reuse the example values, or paste real passwords into tickets or chat. The three values you must change are the PostgreSQL, SurrealDB, and Keycloak administrator passwords.
Step 3: Start VDA
Start all services in the background and check that they come up:
All containers should report Up, and PostgreSQL should report Up (healthy). The first start downloads images and can take a while.
Step 4: Verify the installation
Check that the web UI and the API respond:
# Web UI: expect 200
curl -s -o /dev/null -w "%{http_code}\n" http://localhost:8080/

# GraphQL API: expect {"data":{"__typename":"Query"}}
curl -s -X POST http://localhost:4000/graphql \
  -H "Content-Type: application/json" \
  -d '{"query":"{ __typename }"}'
The full list of checks, with the output you should see for each service, is on Verify the Installation.
Expose only what you must
Only the web UI (port 8080) and Keycloak (port 8081) should be reachable from outside the host. The databases, Temporal, and the LLM engine are bound to 127.0.0.1 and must stay that way.
Step 5: Create your administrator
VDA signs users in through Keycloak, so you create the first administrator there. Open Keycloak at http://localhost:8081 and log in with the administrator username and password from your .env file. Then:
- Create a realm named
vda. - Create an OpenID Connect client with the ID
vda-client, and addhttp://localhost:8080/*as a valid redirect URI. - Create the realm roles
SUPERADMIN,DATA_CONSUMER, andDATA_STEWARD. - Create a user named
vda-admin, set a permanent password, and assign it theSUPERADMINrole.
The click-by-click procedure is in First-Time Setup.
Step 6: Sign in
- Open the VDA web UI at
http://localhost:8080. - Click Sign in with Enterprise SSO.
- Log in as
vda-admin.
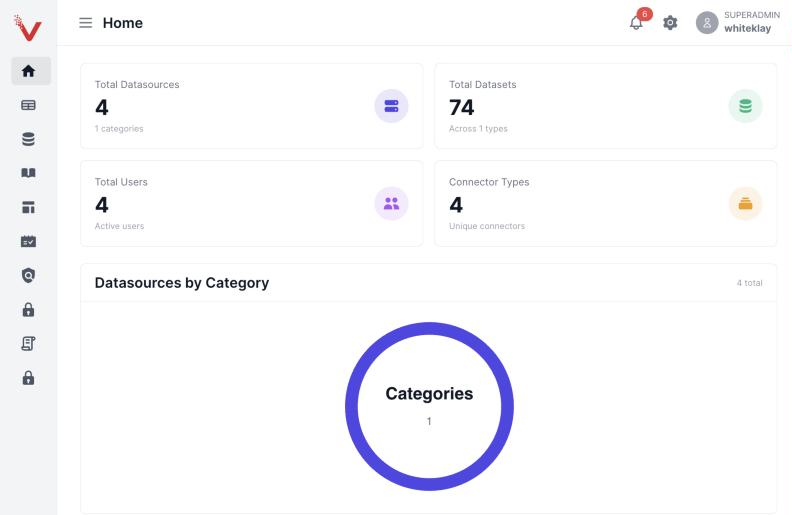
You land on the home dashboard, with every module available in the left sidebar.
Step 7: Connect your first datasource
- Open Datasources from the sidebar and click + Add Data Source.
- Choose your connector (for example PostgreSQL, SQL Server, or Snowflake) and enter the connection details. Use an account with read access to the system catalogs and the tables you want to catalog.
- Click Test Connection, then Save & Ingest.
VDA then extracts the schema, profiles the columns, traces lineage, detects PII, and indexes the metadata for search. Follow progress on the datasource's Ingestion Runs tab. When it finishes, your tables appear in the catalog.
More detail: Connect a Datasource.
Step 8: Take a tour
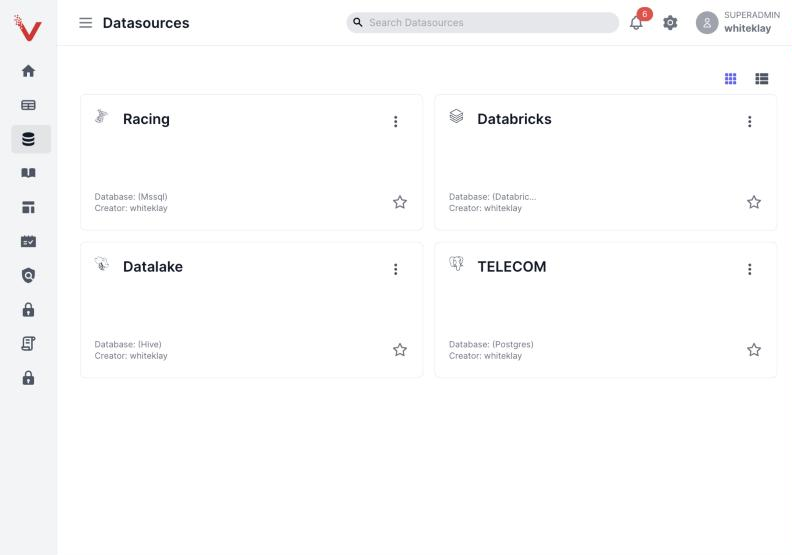
Explore your datasources
Open Datasources to see every connected source, shown as cards with the connector type.
Find and inspect a dataset
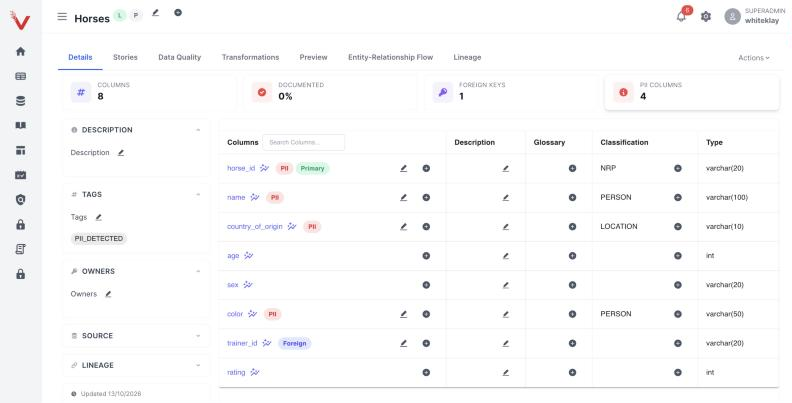
Open Datasets to browse the catalog, then use the search and Advanced Search filters to narrow it down. Open any dataset to see its columns, types, and automatically detected PII.
Learn more: Data Catalog & Discovery.
Ask a question in plain language
Use the Text-to-SQL Studio to turn a business question into SQL, review the explanation, and preview the results. Queries are checked against your permissions before they run.
Text-to-SQL needs a language model
Text-to-SQL relies on a local or cloud model. If it isn't responding, set one up first with LLM & Model Setup.
Learn more: Text-to-SQL Studio.
Check quality and lineage
From a dataset, open the Data Quality tab to review profiling, and the Lineage tab to see upstream sources and downstream consumers. Learn more: Data Quality and Lineage & Impact Analysis.
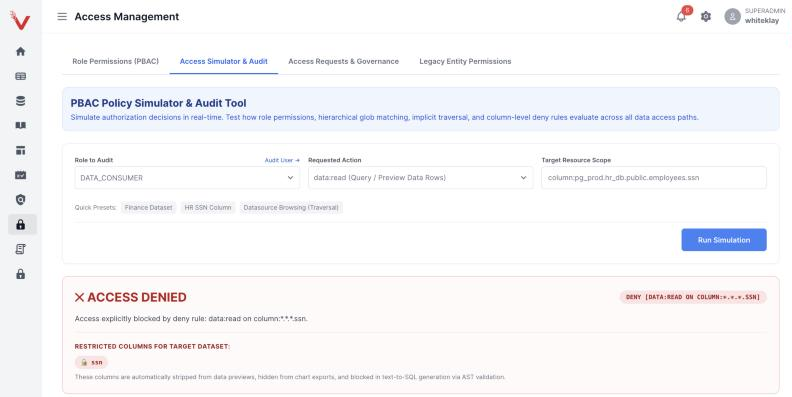
Set and test an access rule
Open Access Management, choose a role, and add an ALLOW or DENY rule. Then use Access Simulator & Audit to confirm the result before it affects users.
Learn more: Access Control & PBAC Governance and the Administration guide.
Next steps
- LLM & Model Setup: choose the local or cloud model tier.
- Backup, Restore & Upgrades: protect your data before you rely on it.
- Air-Gapped Installation: for hosts with no internet access.
- Kubernetes & OpenShift Installation: for production clusters.
- Connect an AI agent through MCP.
- Understand the design in the Architecture overview.